November 15, 2026 · 11 min read
CabinetWizard: 14 Key Questions Answered
The 14 questions cabinet shops ask us most, in one place: what it does, whether it designs kitchens, whether it needs internet, how many PCs, how the demo works.
Our WhatsApp line gets the same handful of questions every day: "Does it do kitchens?", "What happens when the internet drops?", "Do I need to install some other program first?" In this post we've collected the 14 questions we hear most from cabinet shops and answered them in order. We didn't keep it short: each answer explains what the program actually does and which screen you'll find it on. Watch the short video first, then jump to the question you care about.
1. What is CabinetWizard and what does it do?
CabinetWizard is Windows desktop software we built for furniture workshops. You design wardrobes, hall units, bookcases, bathroom vanities and kitchen cabinets; you type the dimensions and the cabinet appears in 3D. Plenty of programs get that far. The difference starts after that: the cabinet you build on screen isn't a picture. Its side panels, bottom, shelves, back, doors and plinth are separate, real parts. That's why the cut list, cutting plan, part labels, DXF, NC programs, assembly sheets and the quote all come out of the same project.
We call this parametric cabinet design: every part is tied to a dimension, so when you change the width, the bottom, shelves and doors rebuild to match. It's also why our site says "from design to a CNC cutting file in 15 minutes": you type a dimension once, and nobody copies it by hand from paper to a list.
2. How is it different from other programs?
Without naming anyone else, here are the choices we made. First, the wizard approach: for a kitchen you answer five questions (shape; columns, beams and doors; dimensions; appliances and plumbing; finishing touches) and the program builds the kitchen. You can get your first job out without a long learning curve. Second, one program: design, rendering, quoting and production output live in the same window. No separate render engine, no separate cut list tool, no separate quoting spreadsheet. Third, offline work: once the full version is activated, it keeps working in a shop with no internet.
In short, we're not just after fast cabinet design; we're after design that's fast and heads to production correctly. The panel you see on screen goes to cutting with the same size.
3. Is it a plug-in or a separate program?
It's a separate program. CabinetWizard is a stand-alone Windows desktop application. It isn't a plug-in that runs inside another drawing program, and it doesn't need any other program installed on your PC. You click the icon, it opens, you start working. The render engine is built in as well. We go into this in detail in our post on what being standalone desktop software means.
4. Does it work without internet?
The full version does. You need internet once, when you first activate the licence; after that the program runs offline. Whether you're in the shop, on a job site or at a customer's house with no signal, you can keep designing and printing cut lists.
The demo is different: the free trial needs internet while it runs, because we track the trial period against the server clock.
5. Who can use it?
We designed it for furniture makers and joinery shops, but interior designers, architects and designers use it too. So can someone planning their own kitchen or wardrobe. You don't need drafting skills: you type dimensions and the program builds the cabinet. If you can drag things, type millimetres and press Ctrl+Z, you're set.
What shops like most is time-saving cabinet design: instead of drawing the same unit again, you add your own cabinet to ⭐ Favorites and next time it comes back exactly as you saved it, insides and all. The 19 short lessons that come with the program (54 minutes in total) walk through everything from the production screen to CNC output, recorded in the program itself.
6. What kinds of cabinets can I design?
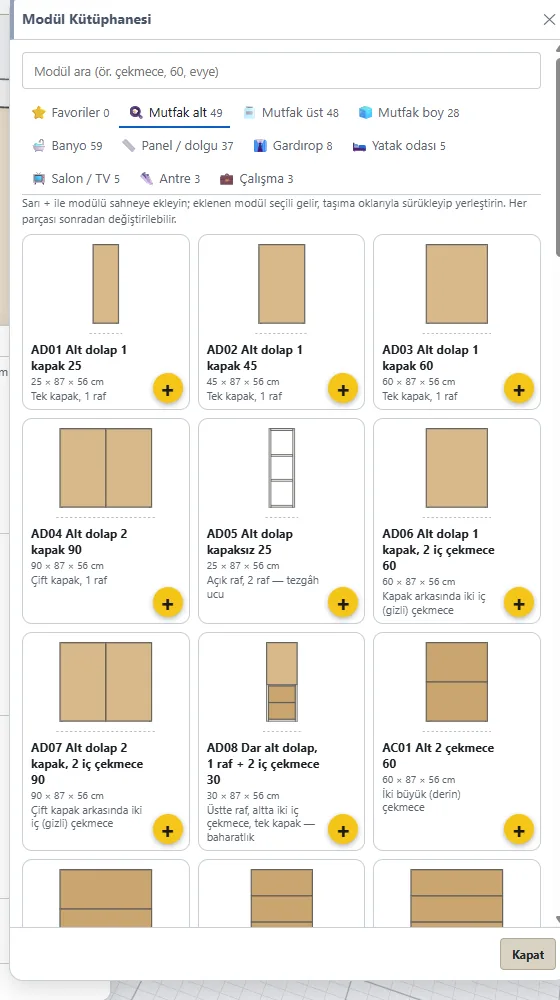
The module library holds 245 ready modules, and every one of them opens up into its panels. The groups are: kitchen base, kitchen wall, kitchen tall, bathroom, panels / fillers, wardrobe, bedroom, living room / TV, entryway and study. Wardrobes, hall units, shoe cabinets, bookcases, bathroom vanities, TV units, walk-in closets, kids' rooms and entryway cabinets are built from this library or from scratch, panel by panel. There are also 7 room templates and a "▦ Fill wall" command for walk-in closets, kids' rooms and entryways.
Every module in the library is a real cabinet, not a frozen template: you can change the side panel thickness, the shelf position or the door swing one by one.
7. Can I design kitchen cabinets too?
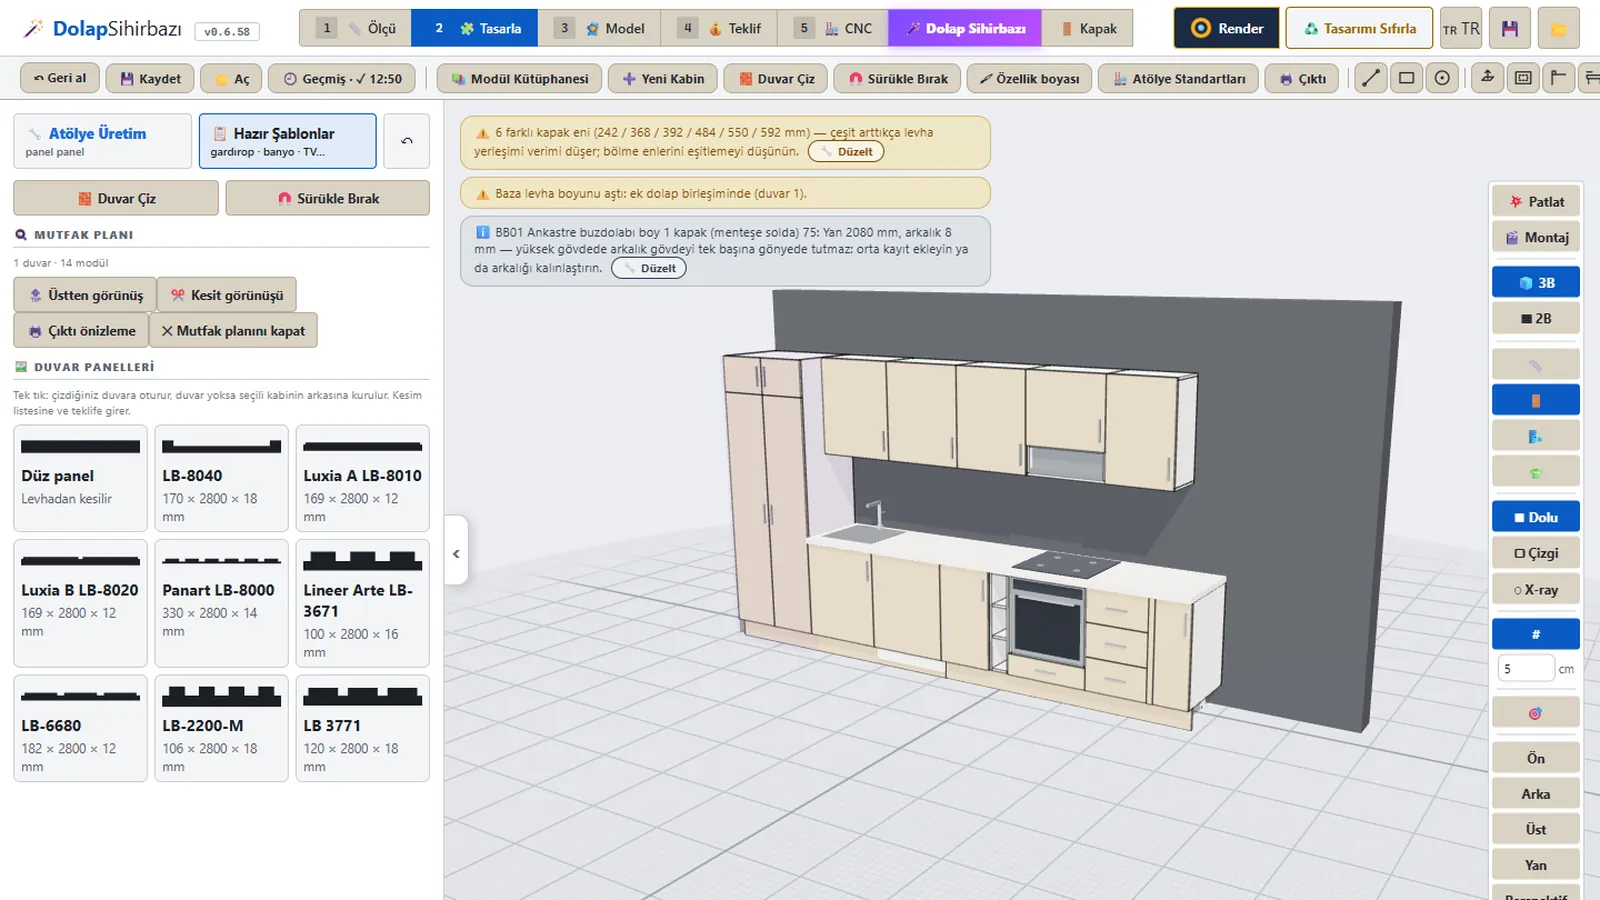
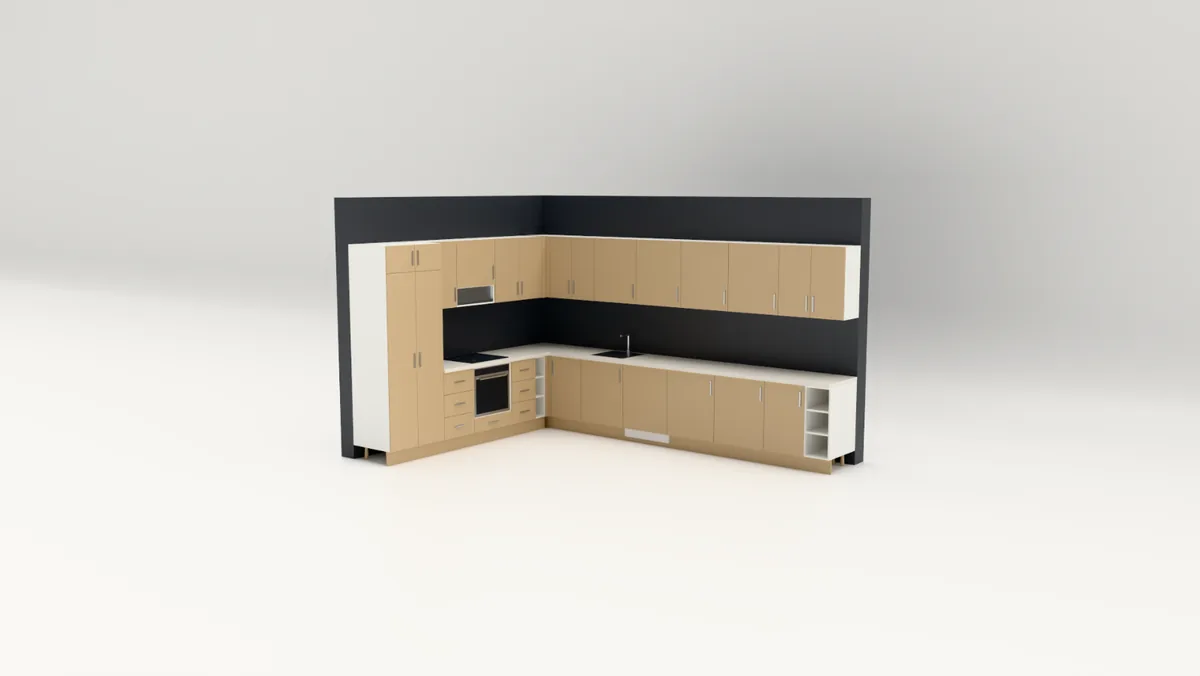
Yes, absolutely. Kitchen cabinetry design is the biggest part of the program. Press the 🪄 wizard button in the top menu; in five questions you set the kitchen shape (straight, L or U), columns, beams, doors and windows, your shop standards, appliances and plumbing, and finally wall cabinets, hood, worktop, plinth and crown. On the live drawing you can drag with the mouse or type millimetres. Click "Create the Kitchen" and it's placed in the scene.
This is smart kitchen planning, and by "smart" we mean the cabinets place themselves around the plumbing, the door swing and the columns. ⚡ Auto Layout puts the sink at the drain, the hob at the gas line and the dishwasher next to the sink. Nothing goes into the area a door swings through. If a column touches a carcass, the carcass is notched in place, and that notch goes to the CNC and DXF output too. On an out-of-square wall each cabinet stays parallel to its own wall and the worktop is mitred on the bisector. The hood flue doesn't cut the beam; it jogs around the front of the beam up to the ceiling.
We also call it dynamic kitchen design: change a wall length, a column position or the sink location in the wizard and the live drawing updates immediately; if you don't like the layout, "💡 Suggest other layouts" shows you three options.
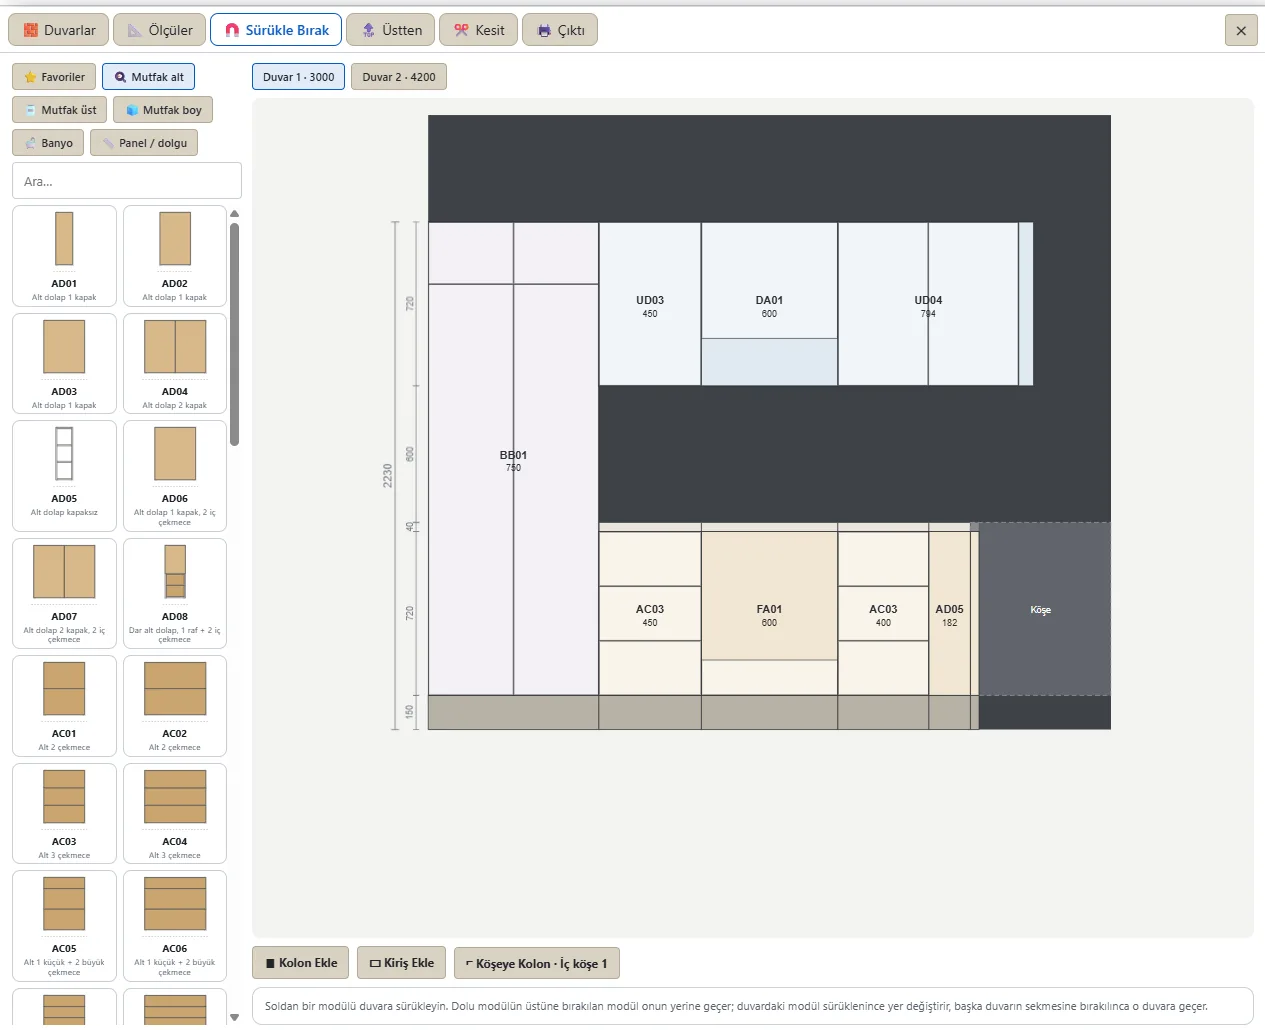
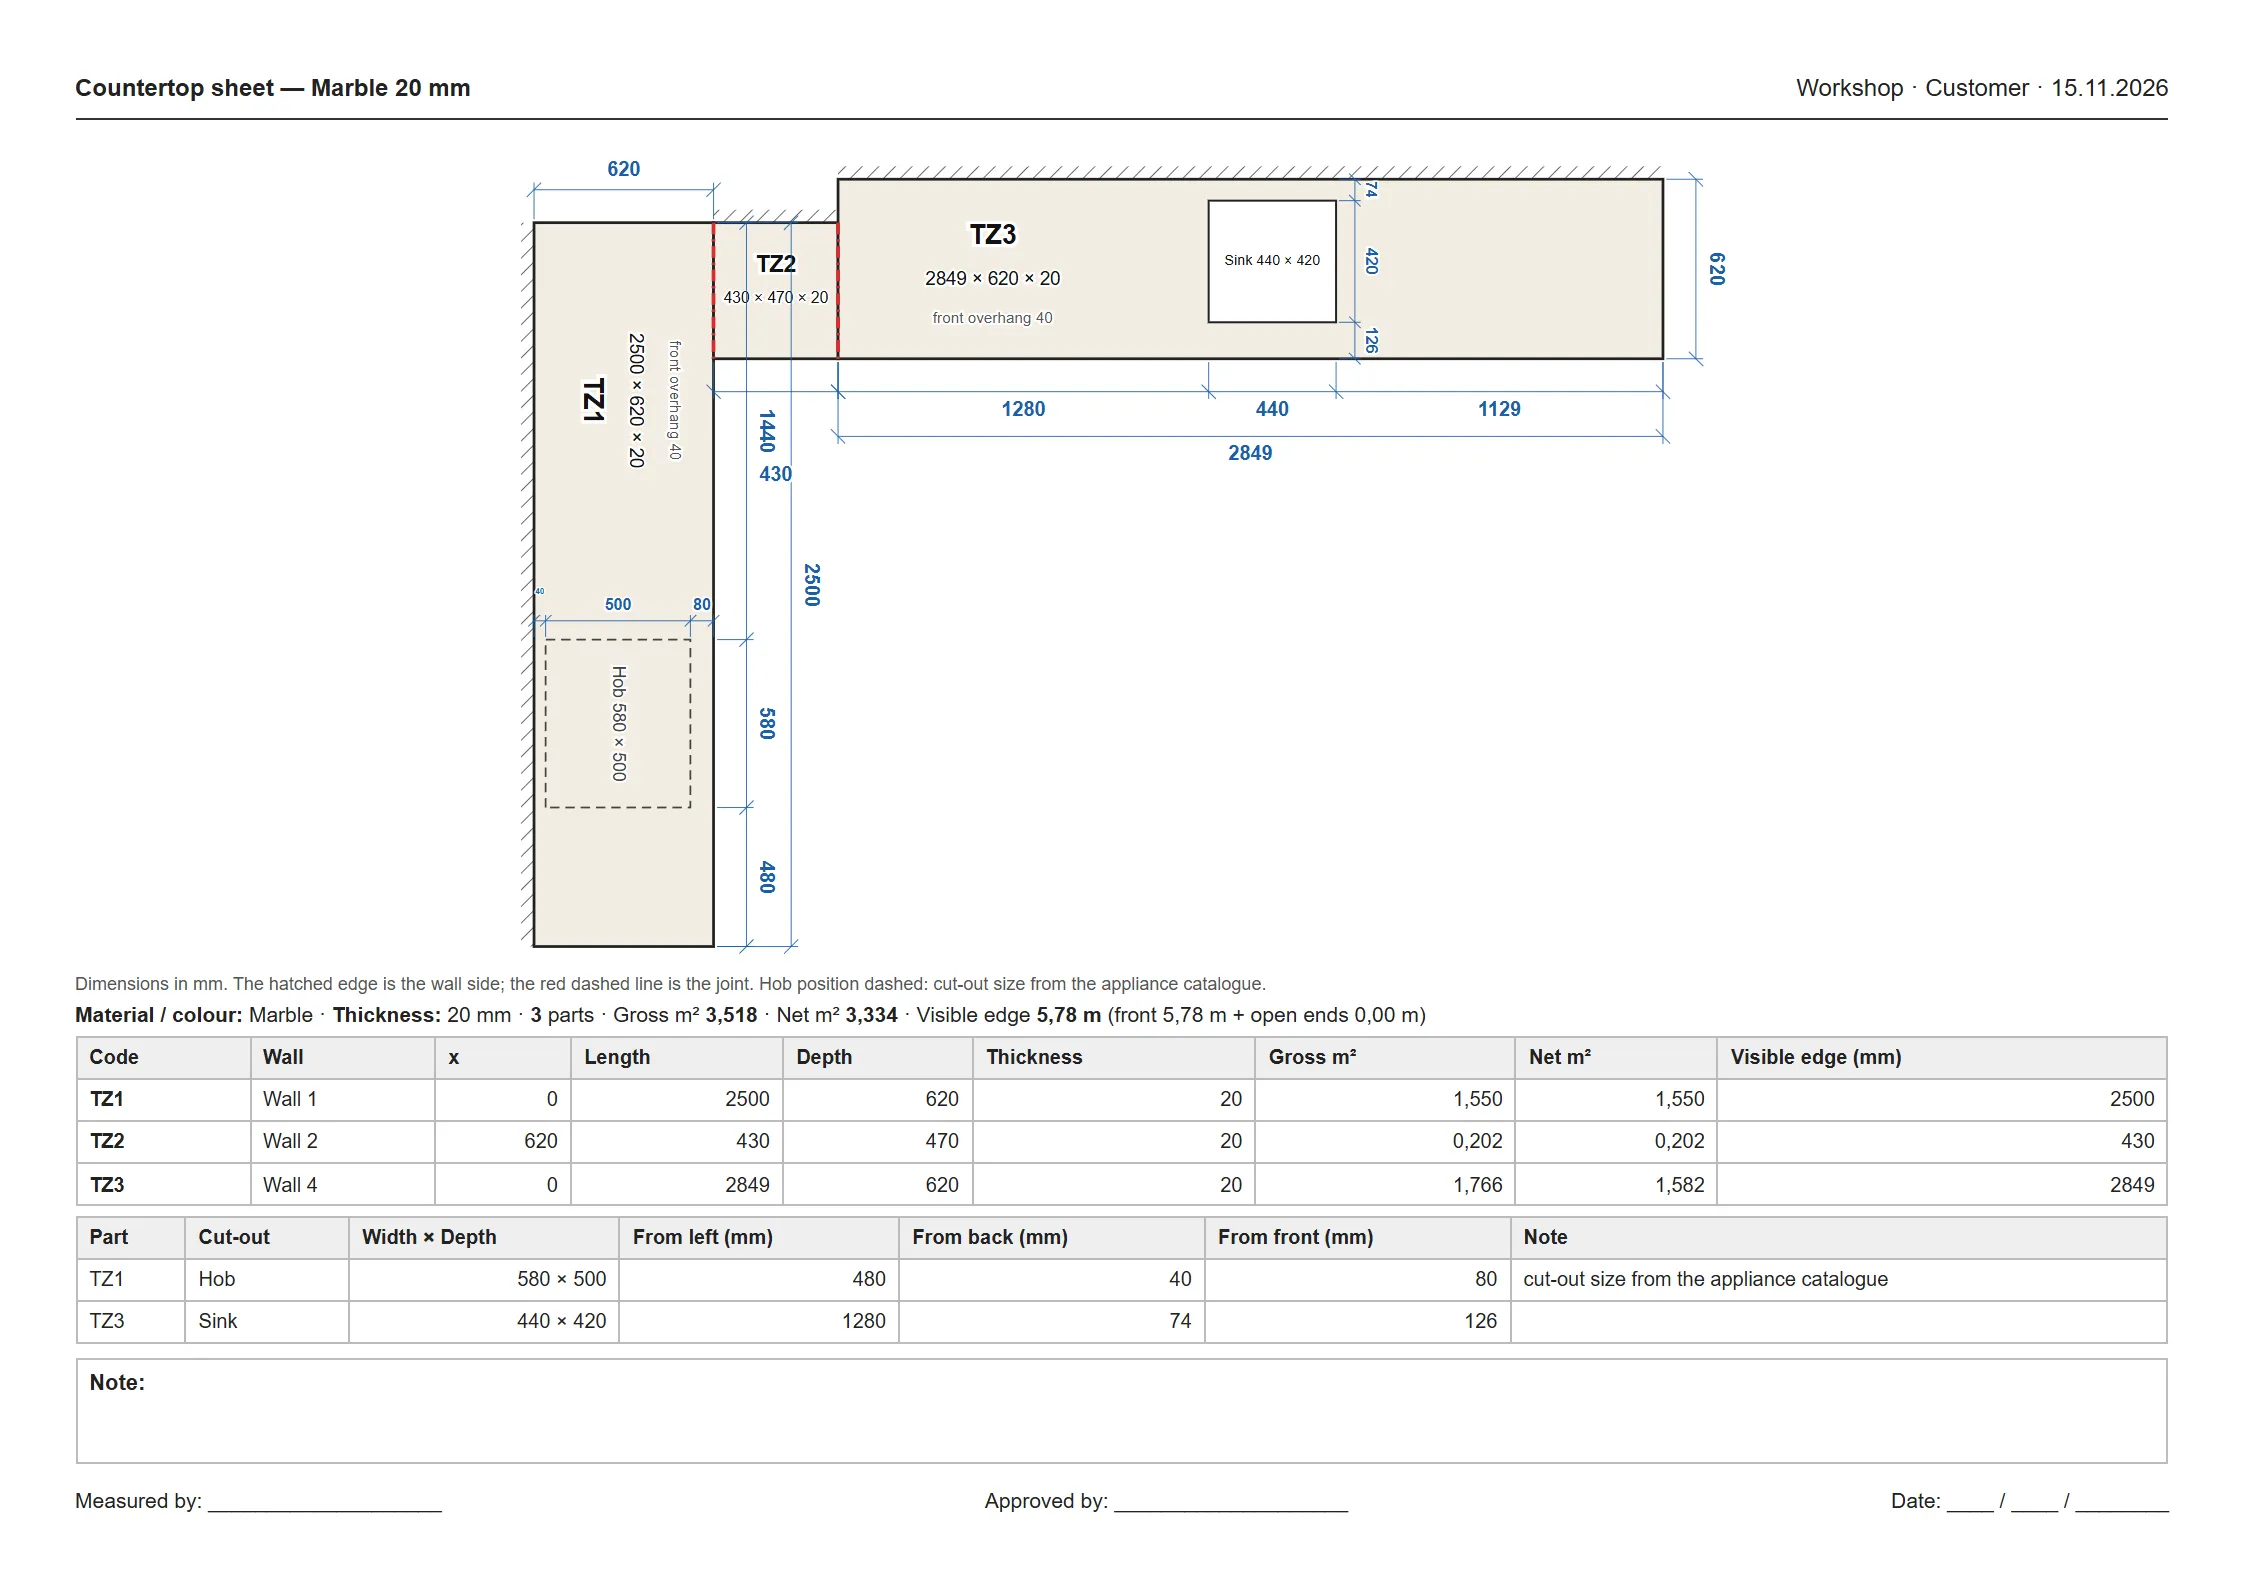
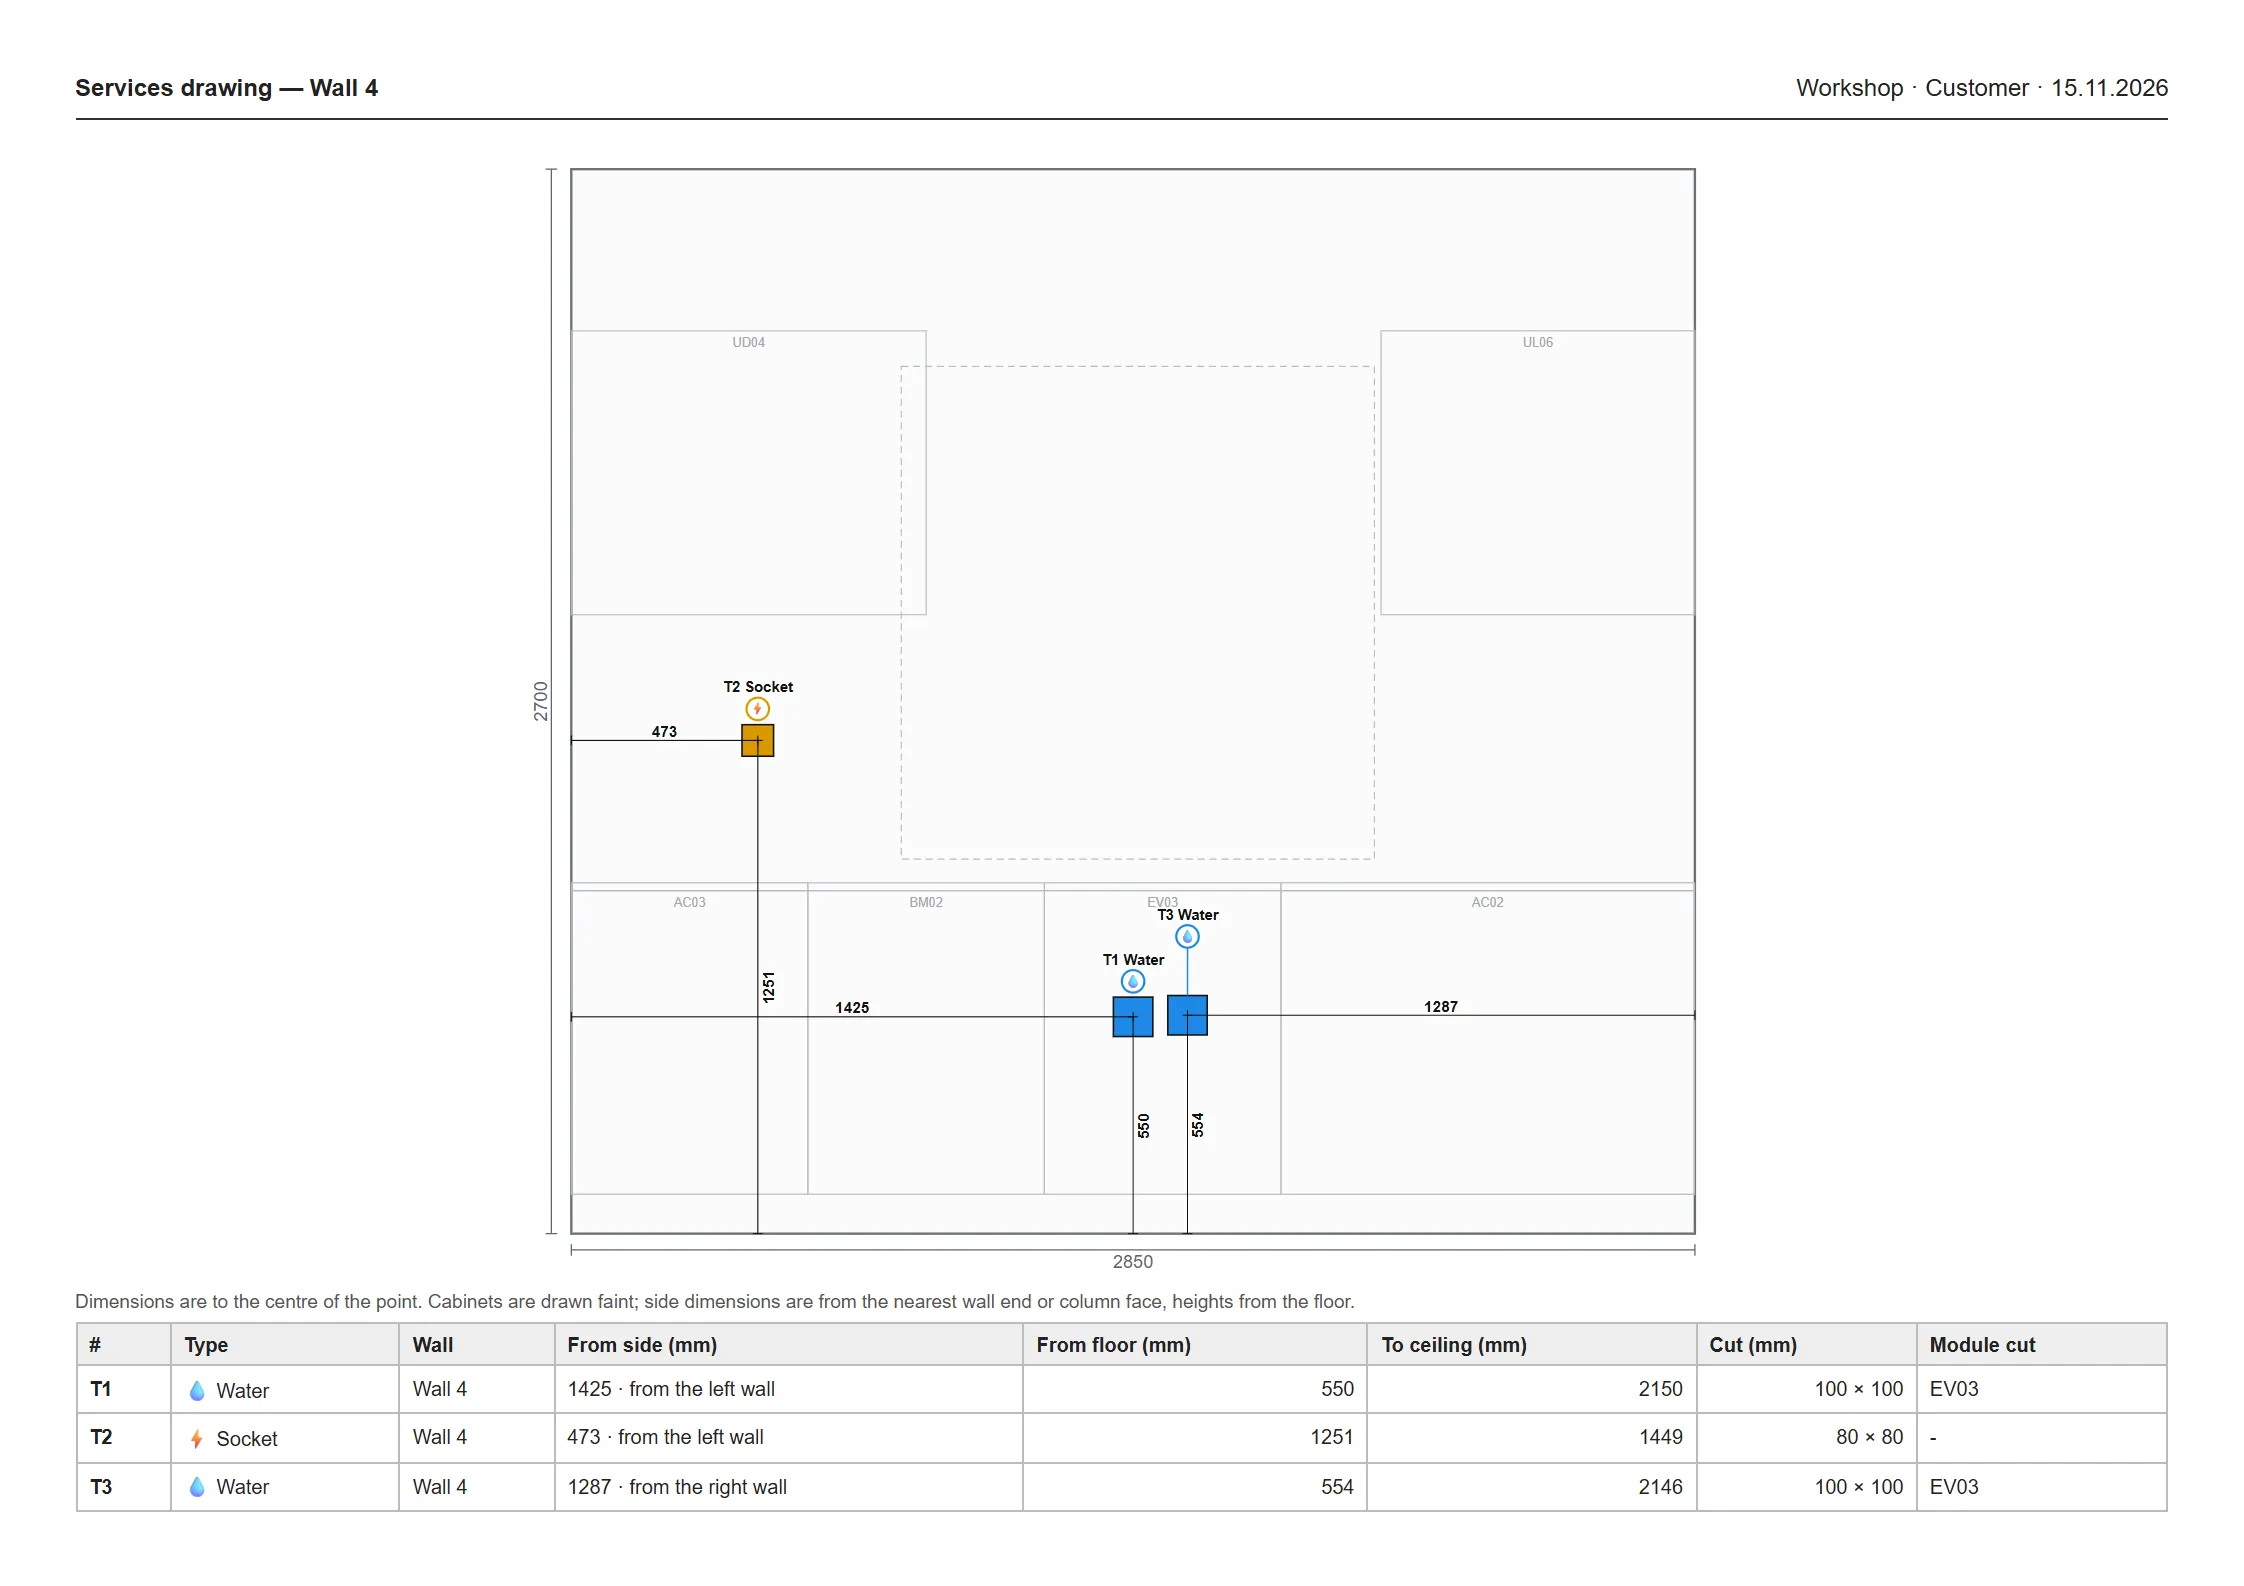
Once the kitchen is built, the Drag & Drop window opens. The drag-and-drop modules there are cabinets you pick from the library and drop on a wall; their code and size are written on the elevation. On the output side you get a worktop sheet for the countertop fabricator (dimensioned top view, TZ codes, joints, sink and hob cut-outs, m² summary, sign-off line) and a plumbing sheet for the plumber (numbered points T1, T2…, side and floor dimensions, a table).
8. Can I enter my own dimensions?
Yes, that's the core of the program. Width, height, depth, number of sections, shelf positions, doors and drawers: you type all of it in millimetres and every change shows up in 3D straight away. Click a panel, type its size and position, choose edge banding edge by edge. That's how parametric dimensions work: change one value and the parts tied to it are recalculated, and the cut list updates itself.
You define your own habits, too. Production Settings works as a dynamic settings page: net or gross edge band deduction, 32 mm system holes, a grooved or overlaid back, drawer box thickness, sheet size… Enter the values once and the outputs follow them. One click switches to the "Standard", "Kitchen 32 mm" or "Series production" preset, and a line saying "N settings differ from the defaults" shows what you've changed. In the wizard's Dimensions step your shop standard is already filled in.
The edge band, the PVC strip glued onto a cut edge, goes onto the cut list with its thickness (0.4 / 0.8 / 1 / 2 mm). The cut list also has a grain direction column, meaning each part states which way the wood pattern runs on a woodgrain board. Filler and cover panels follow the same grain as the doors.
9. What's the price, and is it a one-time payment?
For the current price and launch terms, see the price section of the site; we don't put the number here because it can change with the launch period. What's fixed: it's a one-time payment with no subscription. In Turkey you pay by bank transfer (Havale / EFT); after paying you message us on WhatsApp and the program is delivered there. A second licence for another PC in your shop is 25% off.
Quoting is built into the program as well: enter your own unit prices (per part, per linear metre or per module) in Price Settings, and as soon as the design is done, materials, hardware, labour and margin come out line by line.
10. Is there a free trial?
Yes. The free demo runs for 5 days and can be used once per computer; the remaining time shows in the bottom-right corner. In the demo, design, 3D, rendering, project saving and GLB are open. Production outputs such as NC, cut list, cutting plan, DXF, quote, labels and assembly sheets are in the full version. So in the demo you can build your own project start to finish and render it, and decide for yourself whether the program fits your shop.
11. How many computers can I use it on?
One licence is valid for one PC. A second licence for another computer is 25% off. If you need to move to a new computer, contact us on WhatsApp about transferring the licence and we'll walk you through it.
12. Are updates free?
We recommend asking about update terms on WhatsApp before you buy; that's where we can give you the most accurate answer. What we can say: the program keeps evolving with feedback from manufacturers. After the demo, 100 important changes and updates requested by workshops went into the program. Inside the program, F1 Help lists what changed in each version under What's new.
13. Can I get support?
Yes. Our support line is WhatsApp: +90 530 322 93 01. The number is in the site footer, too. There's help inside the program as well: press F1 to open Help, and the "Take me there" button next to each topic opens the screen being described. The video lessons are recorded in the program itself.
14. Can I use it to present to customers?
Yes, and that's the most enjoyable part. You design right next to the customer; when they say "make that cabinet 10 cm wider", you type the size and the 3D changes instantly. You browse door styles, that is 386 door designs including slab, framed, horizontal groove and vertical batten, and apply the one the customer picks to every cabinet in one step. Changing the handle is just as easy: in the handle window choose the type, hole spacing and finish, then apply it to this door, this set or all of them. A finish change, meaning a new colour or texture, shows up in 3D right away; in Material & Finish you pick the carcass and the doors separately, and if wall and tall doors get a different colour they're counted as a separate material on the cut list.
Then hit Render: the render engine is inside the program, with no settings and no export. You show the customer a realistic image and print a PDF quote from the same project. In that sense the program works like a small cabinet design studio: design, visuals and quote on the same desk.
So how do I get to production?
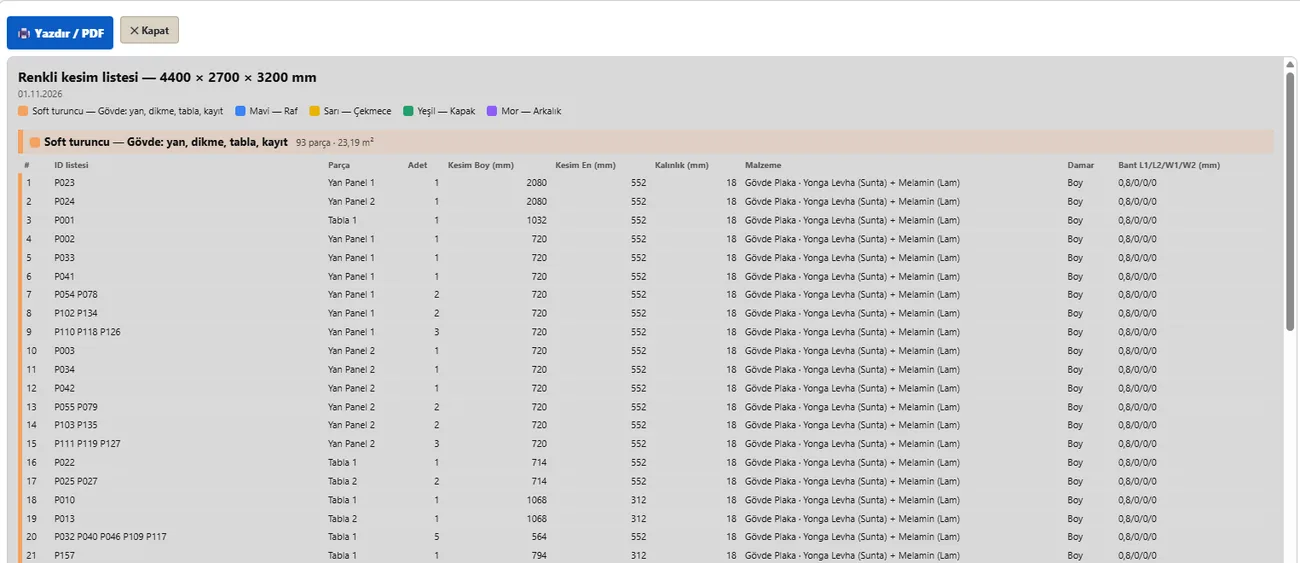
One more topic doesn't fit the list but comes up constantly: what happens when the design is done? On the production side the program produces an automatic cut list: part, quantity, cut size, material and banding in one table. The cut list can be exported as CSV or printed as a colour-coded list. Next comes the cutting plan: sheet nesting, which means arranging parts on the board with the least waste. The program draws the automatic sheet layout for it, with fill percentage and an offcut summary per sheet.
For the machine, the export to CNC step generates NC programs and DXF files: holes first, then the contour, hinge cups included. This is CabinetWizard's own CNC cutting and machining system: holes are placed automatically based on neighbouring panels, cutter diameter, step-down and machine settings come from the Machine Profile, and the generated code is read back and checked. The CNC/DXF output also opens in whatever CAM software your shop uses. That way CNC cabinetmaking runs from screen to machine without a break.
One note on error-free CNC cutting: NC programs are generated from your shop settings, so prove out the first job on your machine with a test piece. The program also acts like a second pair of eyes: it suggests an extra hinge on a heavy door and a mid rail on a tall carcass, and for a dangerous problem it won't let you output until you click "Got it".
Final word
If something you want to know isn't covered by these 14 questions, message us on WhatsApp. Better still, try it yourself: download the free demo, draw a real job from your shop, build a kitchen with the wizard and render it. Five days is plenty of time to see whether the program is right for you.
By Ufuk Şen, developer of CabinetWizard