November 15, 2026 · 11 min read
386 Cabinet Door Styles in One Click with CabinetWizard
When the client wants different doors, don't redraw the kitchen. Each of the 386 door designs is built to the door's own size, and handles, finishes and door patterns change in the same project.
The kitchen is drawn, the client likes it, then the phone rings: "What if we went with shaker doors?" In a shop that works by hand, that sentence means half a day. Every door has its own size, so you work out the frame for each one, redo the drawing and write a new list for the door supplier. In CabinetWizard it is a model choice. The Door section has 386 door designs, and none of them is a picture pasted onto the door: each design is rebuilt to the width and height of the door you apply it to. In this article we walk through the Door section, choosing handles and finishes, and the Part Machining screen where you draw your own door pattern, with real shop examples.
Why did a door change use to take so long?
In one kitchen, the same door model comes out in dozens of sizes. The two leaves of a 36" wall cabinet, the single door of a 24" base, the long door of an 18" tall unit and every drawer front are all different rectangles. On a framed door the stile width stays the same but the center panel changes on every door; on a grooved door the groove spacing has to be divided again for each height. Doing that by hand is slow and error-prone: on a small drawer front the frame swallows the panel, and on a tall pantry door the grooves drift.
In the program, this calculation is simply part of parametric cabinet design. Parametric here means the design recalculates itself when sizes change: if a door grows from 300 mm to 600 mm, the frame stays the same, the panel grows and the pattern spacing is redistributed. You pick the model once; the program does the rest for every door separately. Answering the client's "let's see one more option" within minutes is what makes this genuinely time-saving cabinet design.
What is in the Door section?
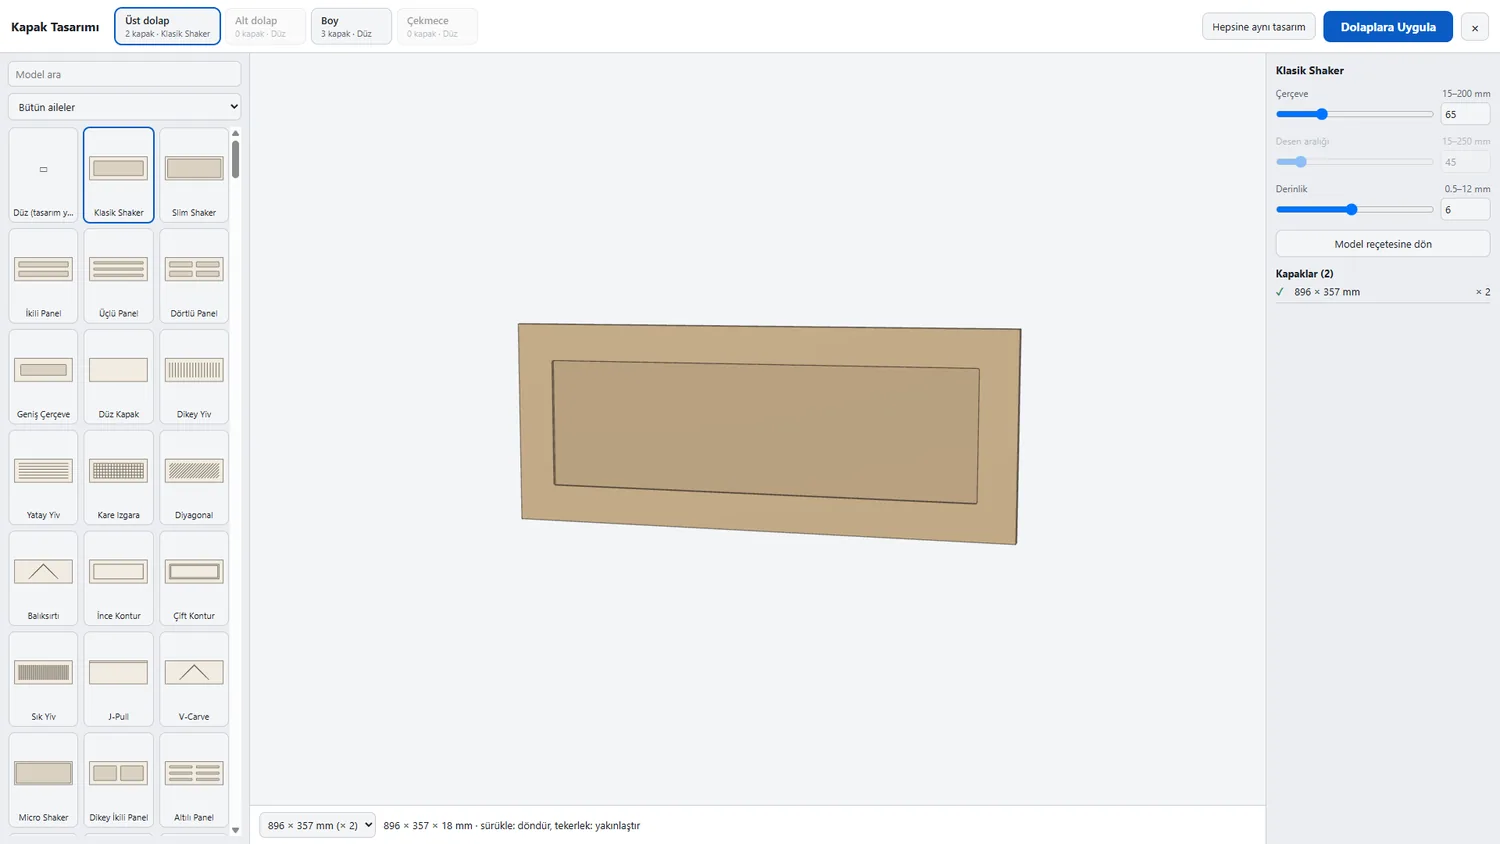
Click Door in the top bar and the Door design screen opens. The layout:
- Four tabs across the top: Wall cabinet, Base cabinet, Tall and Drawer. Each tab shows the number of doors in that row and the selected model, for example "Wall cabinet · 2 doors · Classic Shaker".
- Model list on the left: the 386 designs are laid out as thumbnails. Type a name into the search box or narrow the list by family. Classic Shaker, Slim Shaker, Micro Shaker, two-, three-, four- and six-panel, Wide Frame, vertical and horizontal grooves, Fine Grooves, Square Grid, Diagonal, Herringbone, Thin and Double Contour are just a few of them.
- Live 3D in the middle: the selected door is shown at its real size; drag to rotate, scroll to zoom.
- Settings on the right: Frame (15–200 mm), Pattern spacing (15–250 mm) and Depth (0.5–12 mm) sliders, each with a millimetre box. If you don't like the result, "Back to model recipe" restores the model's own values.
- Door list: every door size in that row with its count, such as "896 × 357 mm × 2". Pick any size from the selector below the view to check how the design looks on the smallest and largest door.
The two buttons at the top right are where the speed comes from. Same design for all writes the selected model and its settings to every row. Apply to cabinets pushes the design to the cabinets in the project in one step, and ↶ undoes it. If you want shaker wall cabinets, slab base cabinets and thin-contour drawer fronts, you choose each on its own tab and still apply everything in one step.
How do the designs fit the door, and when does a door stay flat?
Door styles (the slab, framed, grooved or patterned face of a door) are resolved on the face in this program, and that matters in the shop: the door design does not change the cut list. The door is still the same size, cut from the same sheet; hinge position, opening direction and selection behaviour all stay as they were. The design is a definition of the milling on the door's front face.
Our documentation also lists some limits, and it helps to know them:
- A door whose shortest side is under 100 mm stays flat; a frame does not fit on a very narrow door.
- Doors with a manual cut-out, glass doors and mirror doors are skipped and shown as such in the list. Aluminium-frame glass doors are skipped in the Door section too.
- The handle position does not move with the design. If a handle hole would land in a glass opening, the door stays flat; if it falls on a center panel or a groove, a note appears.
Handles and finishes: the other half of the door
The client notices the handle (the pull fitted to a door or drawer) as much as the door model. The program has 16 handle models: on top of long and short bar, knob, square knob, slim profile and the handleless push-to-open option, there are tube, T-bar, bridge, square bridge, cup, finger pull, recessed, tall-door handle, ring and leather. In the handle window you pick the scope (this door, this drawer, this set or all), choose the hole spacing from 96–320 mm or type it, set the hole diameter to 4, 5 or 6 mm, and use the 3 × 3 quick-position grid to move the handle to a corner or the center. The hole, the 3D view and the hardware line all come from the same calculation. A handle is placed to fit within the door front, and on framed models a vertical handle sits in the middle of the vertical stile. Two details to know: the finger pull has no holes and sits on the edge; the recessed handle is a surface model only, and its pocket milling is not in the output.
A finish change (switching the surface colour or material of carcass, door or handle) is just as easy. Handle finishes, including the new satin nickel and antique brass, show in their colour in 3D. For doors there are two separate places: Colour & Texture is visual only and does not change cost, while Material & Finish sets the board and finish type for carcass and doors and does affect the price in the quote. For a two-tone kitchen, Colour & Texture › Wall and tall doors gives wall and tall doors a different colour or texture from the base cabinets, and they appear as a separate material in the cut list, labels, assembly sheet and sheet layout.
In a kitchen with many modules you don't have to open each one: ☑ Select similar on the right-click menu picks modules of the same type, and the 🎨 Door and handle window changes door model, handle type and handle finish for all of them from thumbnails. In the kitchen plan the same window is on the module card.
Drawing your own door pattern: the Part Machining screen
If 386 designs aren't enough, draw your own. Right-click a door and choose ✂ Machining to open the Part Machining screen: the front and back faces of the door are shown in 2D, and with the drawing and editing tools you define operations such as grooves, pockets, V-grooves, engraving and holes. Ready-made patterns and the Groove / Frame presets save time; cutters, V-bits and drills from the Tool Library are assigned to each operation. In 3D, straight grooves, V-grooves, pockets and bead profiles appear with their real shape.
The ⇶ Apply this design to all doors button in the screen header spreads the pattern you drew on one door across every door, proportionally. Lines tied to an edge keep the same margin from that edge, decorative circles scale with the size of the door, and holes such as the 35 mm hinge cup stay fixed. If the source is a drawer front, the pattern goes to drawer fronts only. In the kitchen plan, ✂ Machining now also opens the drawer fronts of a drawer module that has no doors.
This is where CabinetWizard's own CNC cutting and machining system comes in: the door pattern doesn't stay on screen; it goes into the NC package as a separate front-face program that runs before the main sheet-cutting program. For doors the sheet is flipped; for drawer fronts it stays face up. The tool comes from your router settings, and no NC is generated for a tool outside the 3–25 mm range. Designs such as J-Pull and V-Carve need special tooling; for those you get a warning instead of NC. To be straight with you: the door front-face output is marked experimental in our documentation, and it says so on screen and in the program header. We recommend cutting the first door on a test board and measuring it.
From door to cutting: how does the workflow run?
All of this fits the daily routine of a shop doing CNC cabinetmaking. When you export to CNC, carcass parts, drilling and door front-face programs are calculated from one project; per-part CNC/DXF files come out as well and open in whatever CAM software your shop uses. The check in the Machine Profile reads the generated code back and writes no file if it finds an error. The road to error-free CNC cutting runs through the fact that the door on screen and the door on the machine come from the same calculation.
The cutting side doesn't change: the automatic cut list (the list that pulls part sizes, materials and banding straight from the project) groups doors by material. Cut list › Door order gives a separate list for shops that buy doors in. The Cutting Plan draws an automatic sheet layout, and sheet nesting (placing parts on the sheet with the least waste) nests the doors together with the other parts. Grain direction (the way the pattern runs on a woodgrain board) is a column in the cut list; if you set orientation to free in the Cutting Plan, even woodgrain doors may be rotated 90°, so that call stays with you. Fillers and end panels cut from door material take the same grain as the doors. Edge banding (the PVC strip on the door's edges) is counted in metres in the cut list, and the banding diagram is printed on the label.
One note: there is no separate quote line for the door model. Our documentation says so plainly; we didn't invent a price for door milling and slip it into the list. In the quote, board and finish type set the price. For current pricing and launch terms, see the pricing section.
Doors in the kitchen and in other rooms
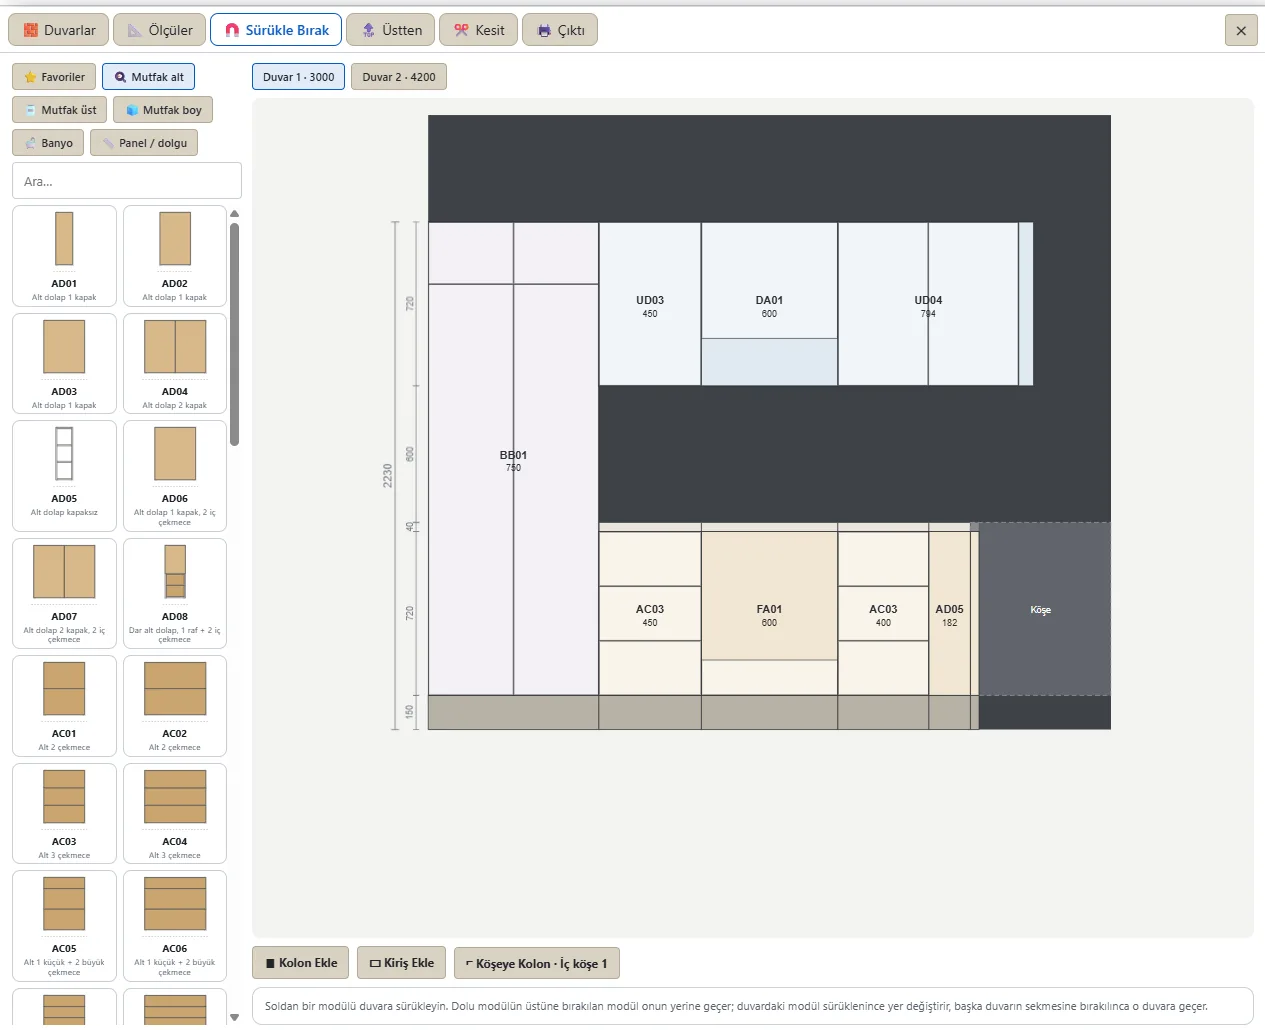
The Door section fits into kitchen cabinetry design, where base, wall, tall and drawer rows are planned together; the kitchen plan records which row each module is in, and the program puts its doors on the right tab. Wardrobes, hallway units and kids' room cabinets get their doors the same way. If you add drag-and-drop modules (cabinets dropped onto a wall from the 245 ready-made modules on the Drag and Drop screen) after applying a door design, applying that tab once more is enough.
This is what dynamic kitchen design looks like: one change ripples through the whole kitchen, and you don't walk module by module. In smart kitchen planning, a layout where cabinets place themselves according to the door swing, the plumbing and the columns, the door design is the last layer and never breaks the calculation beneath it. We explain how a door stays in place on a cabinet with a column in our automatic notching article, and the J-profile for handleless doors in our gola article.
Your standards aren't scattered either: screens such as Size standard, Machine Profile and Divider Settings act as the program's dynamic settings page; change a value and the linked cabinets are recalculated, with the door design re-fitted to the new size. A parametric dimension change, such as the wall cabinet height, doesn't reset the door design; it is rebuilt on the new door. Everything sits in one window, laid out like a cabinet design studio. Switching the door model and rendering it while the client sits next to you is where fast cabinet design pays off most. You can also see the Door section in the door design section of the home page.
Frequently asked questions
Can all 386 door designs be cut on a CNC router?
Designs milled with a 3–25 mm cutter get a front-face NC program. Designs that need special tooling, such as J-Pull and V-Carve, get a warning instead of NC. The door front-face output is marked experimental; cut the first part on a test board.
Does changing the door model change the cut list?
No. The door stays a part of the same size and material; the design defines the milling on its front face.
Can wall and base cabinets have different door models?
Yes. Pick a model on each of the Wall, Base, Tall and Drawer tabs; Apply to cabinets applies them all in one step, and ↶ undoes it.
Can I draw my own pattern?
Yes, on the Part Machining screen. With ⇶ Apply this design to all doors, the pattern drawn on one door is spread proportionally across all doors.
Is the Door section open in the demo?
The demo has design, 3D and rendering open, so you can try the door models. Production outputs such as door NC are in the full version. For more, read our 14 key questions.
By Ufuk Şen, developer of CabinetWizard