November 15, 2026 · 9 min read
Make Your Kitchen Design CNC-Ready in Seconds
How do you get from a bare wall to a kitchen with a cut list, sheet layout and NC files ready? We followed a kitchen in CabinetWizard step by step until it was CNC-ready.
On a kitchen job, time disappears in two places: rebuilding the drawing after measuring at the customer's house, and then breaking every single cabinet down into parts once the drawing is done. CabinetWizard removes the second step. The moment you set up the kitchen, the cabinets' parts, holes, banding and sheet layout already exist; when you move to the CNC step, the calculation is done in an instant. In this article we follow the path from a bare wall to a CNC-ready kitchen in the order it actually happens in the shop.
Where does kitchen cabinetry design start?
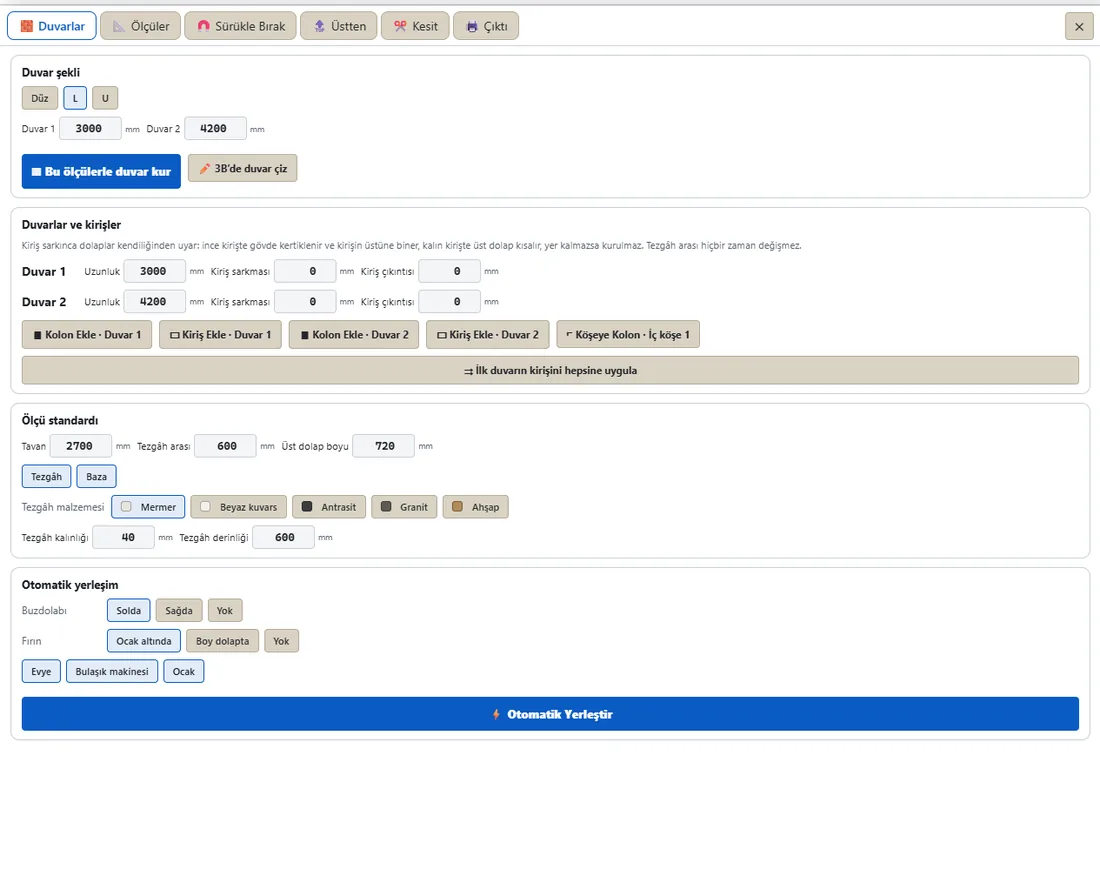
Take a typical job: an L-shaped kitchen on two walls of 3800 mm and 2400 mm, a column near the corner, the sink under the window. Kitchen cabinetry design, planning the base, wall and tall units around the walls, the appliances and the services, starts in CabinetWizard with the 🪄 CabinetWizard button in the top menu. The wizard asks five questions:
- Shape: straight, L or U; wall lengths and ceiling height.
- Column, beam, door: place columns, beams, doors and windows by dragging or typing millimetres.
- Dimensions: your workshop standard is filled in; you see it in a live section.
- Appliances and services: sink, hob, oven, fridge; water, drain and gas come with the appliance, and sockets are suggested.
- Finishing touches: wall units, cooker hood, worktop, plinth, crown; a summary and warnings.
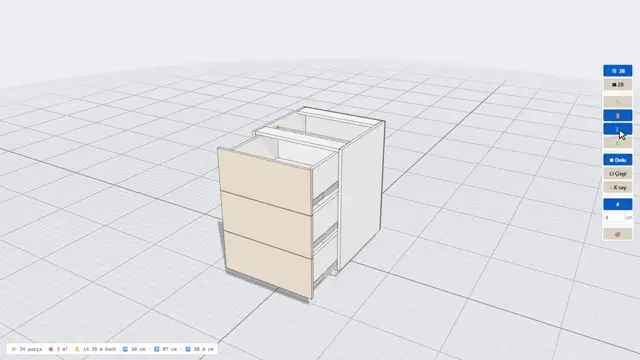
Press 🪄 Create Kitchen and the kitchen is built in the scene. While doing this the wizard follows a smart kitchen logic, meaning a plan in which cabinets place themselves around the door swing, the services and the columns: the hob and fridge are placed according to the work triangle, a drawer unit in front of a column becomes a door unit, and cabinets in front of doors and windows are cleared. If you do not like something, Undo takes you back to before the wizard.
How do you fine-tune the plan with drag-and-drop modules?
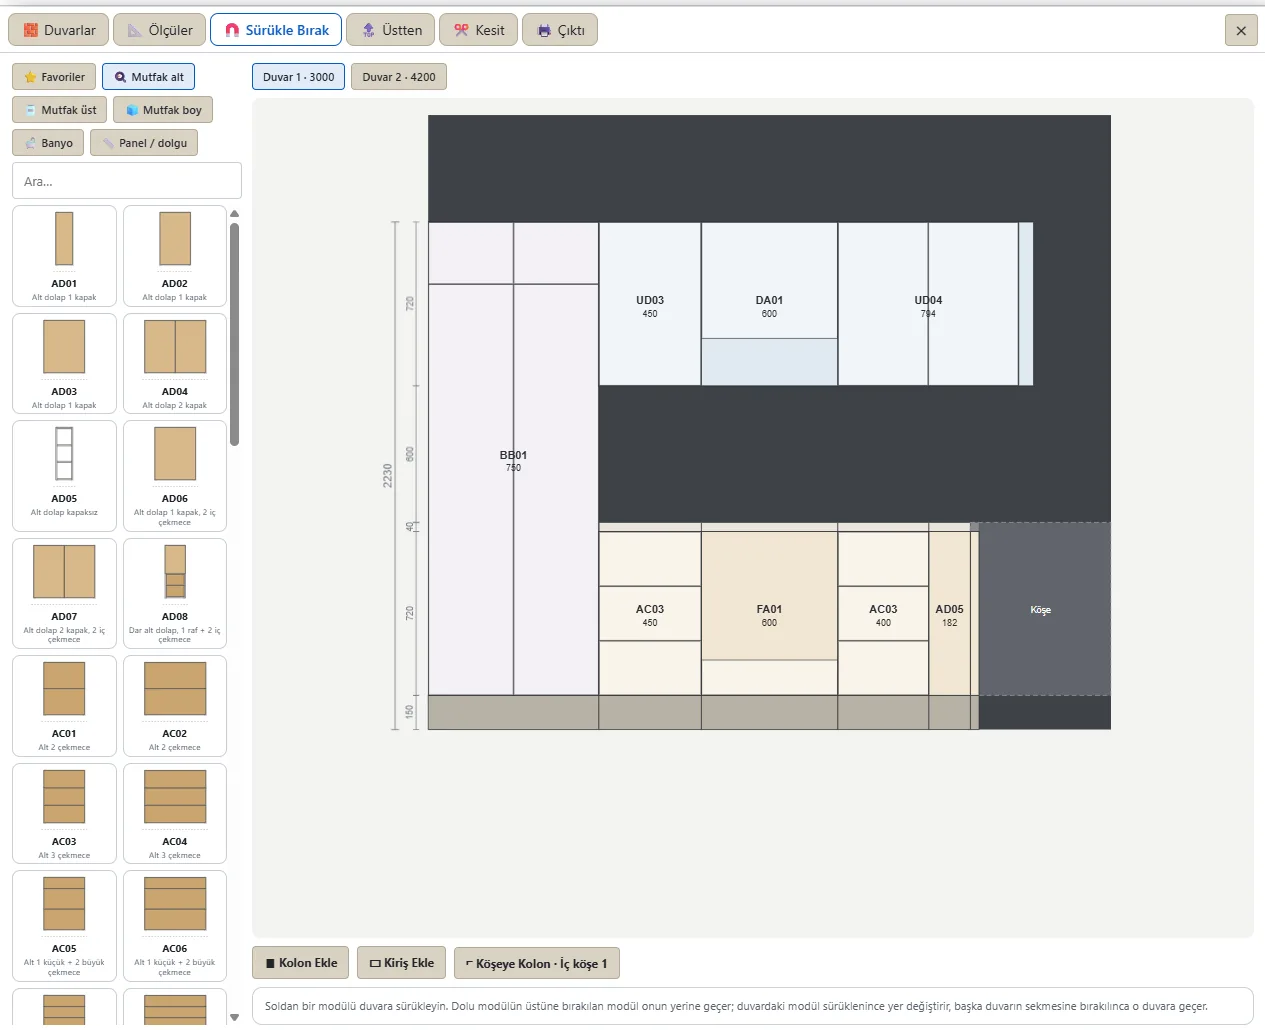
What the wizard builds is a starting point; the real adjustments happen in the Drag and Drop screen. Drag-and-drop modules are ready base, wall and tall units that you drop from a palette onto the wall. Drop a module, snap it into place, swap it with another, move it to a different wall; pull its width with a handle or type it in millimetres. The program has 245 ready modules, and you can add your own edited module to favourites with ⭐.
This is where parametric cabinet design shows its value: when you widen a 600 mm sink base to 800 mm, it is not just the picture of a box that grows; the bottom, back, door and connector holes are recalculated. Thanks to parametric dimensions, part sizes derived from the cabinet's width, height and depth, the cut list matches the design at every moment. Click an empty gap and "Fill remaining space" appears; Ctrl+D duplicates the selected module right next to it.
We call this behaviour, where doors, parts and output update together when you change one dimension, dynamic kitchen design. When the customer says "let's move the fridge to the left", you do not delete the plan and redraw it; you move the module and everything else follows.
How do columns, beams and services reach the CNC?
Columns, beams and recesses are what eat the most time on site. Enter a column or beam with its width, depth, distance from the left and bottom and top levels; when a cabinet touches it, the carcass is notched in place. If enough depth remains in front of a beam, the wall unit wraps around it; if not, the unit gets shorter. Service points live on the plan's walls too: if a cabinet sits over a socket, water, drain or gas point, the back panel is cut at that point. The installer enters the cut-out size at each point.
All these notches and cut-outs go to the cut list, the NC program and the DXF with the same dimensions. Work that used to be done with a jigsaw on site is done by the machine in the shop. We describe the order in which the machine handles notches and cut-outs in our article on accurate CNC cutting.
Where do the dimension standard and shop settings live?
Every shop has its own worktop height, wall unit height and way of fixing back panels. To avoid retyping them on every job you use the Workshop Standards window: panel thickness, banding allowance, door gap, back panel groove and default hinge and runner are entered once and applied to every new job automatically. Open and older projects are left untouched. If you type a value outside the allowed range it is not saved; a red message shows the permitted range.
In the kitchen plan, the Walls › Dimension standard card holds kitchen sizes such as worktop, wall unit and top unit. These screens are a dynamic settings page in practice: switch on top units and cabinets are added above the wall and tall units up to the ceiling; choose a 50, 100 or 150 mm crown and the top unit height adjusts by itself. You see the result on screen straight away.
What happens when doors, handles and colours change?
Once the customer approves the plan, the most frequent requests are about looks. You can switch between door styles, flat, framed or patterned door types, from 386 door designs, and choose the handle model and its position. You can also give the wall and tall unit doors a different colour from the base units; in that two-tone kitchen the colours are kept separate in the cut list, on the labels and in the sheet layout, so they never end up on the same sheet.
A finish change, changing a door's or carcass's material and surface, leaves the sizes alone. With the Property painter you click to transfer one cabinet's door design, handle, banding, carcass and door material to other cabinets; sizes, divisions and layout stay put, and a single Undo reverses it. Material and finish choices also change the price on the quote, while Colour & Texture only changes appearance.
What happens when you export to CNC?
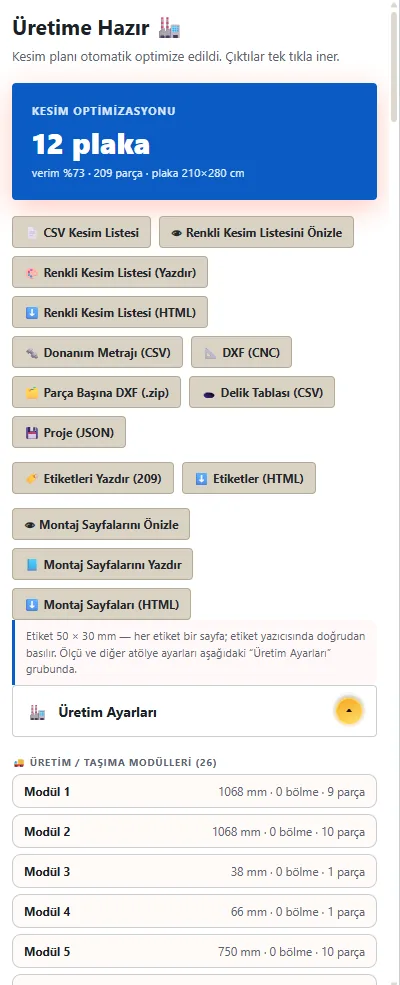
When the design is finished you move to the CNC step in the top menu. "Export to CNC" is not a separate conversion here: because the program already knows the kitchen part by part, the Ready for Production screen shows the cutting optimisation result as soon as it opens: how many sheets, the yield percentage, the part count. The sheet summary shows waste on separate lines for carcass, doors and backs. This calculation happens in an instant, which is where the "in seconds" in the title comes from.
The same screen gives you these outputs:
- An automatic cut list, built without anyone counting parts, as CSV or as a colour-coded cut list.
- An automatic sheet layout showing which part sits on which sheet; sheet nesting, arranging parts on the sheet with the least waste, happens here.
- DXF and per-part DXF (.zip), plus a hole table (CSV).
- An NC (G-code) package for the CNC router: one program per sheet.
- Part labels, module labels, assembly sheets and a hardware take-off.
In the cut list each part's edge banding is written separately for all four edges, and grain direction has its own column. In the router layout doors are nested with their pattern direction preserved. All of this comes out for the whole kitchen in one go; you do not write lists cabinet by cabinet.
How is the file sent to the machine protected?
This is where CabinetWizard's own CNC cutting and machining system works: NC programs are generated with your shop settings, the tools in the Tool Library and your Machine Profile, and the generated code is read back and checked; if there is an error, no file is produced. In a kitchen, error-free CNC cutting, every door, side panel and notched carcass leaving the sheet at its drawn size, depends on no size being retyped anywhere along that chain. If your machine does not read G-code directly, you open the CNC/DXF output in your shop's CAM software; the DXF hole layers are separated by type and face. Before taking production output you tick a box confirming you will check the sizes yourself; when the design changes, that confirmation drops.
Kitchen-specific outputs come from the same project: the worktop sheet, the services drawing and the kitchen plan sheets. You can look at a sample CNC nesting output as a PDF.
How long does it really take from kitchen to cutting?
On our site we say you can "go from kitchen and cabinet design to the CNC cutting file in 15 minutes". What makes that possible is that fast cabinet design arrives together with the production data: drawing and cut list are not separate jobs. Time-saving cabinet design becomes concrete here: when the customer changes a size, only the changed parts are listed and recut.
The path is the same for a wardrobe, a closet or an entryway unit; every cabinet is built from its parts. Think of the program as your own cabinet design studio: design, rendering, quoting and CNC cabinetmaking outputs in one window. We explain how the cut list, CNC and rendering work together in our one-program article. For the current price and launch terms, see the pricing section.
Frequently asked questions
Can I draw a kitchen without the wizard?
Yes. With Draw Walls you set up a straight, L or U wall by typing millimetres or drawing in 3D, then place modules with Drag and Drop.
What else besides kitchens can I design?
Wardrobes, walk-in closets, kids' rooms, entryways, hallway units, bookcases and bathroom cabinets are designed in the same program.
Can I get CNC output in the demo?
No. In the 5-day demo, design, 3D and rendering are open; NC, DXF, cut list, cutting plan, labels and quotes are in the full version.
Do I need an internet connection?
The full version connects to the internet once, at first activation, and then works offline. The demo needs internet while it runs.
By Ufuk Şen, developer of CabinetWizard