November 15, 2026 · 10 min read
Enter the Dimensions, CabinetWizard Does the Rest
Start with the measurements from the customer's home, answer five questions, press Create the Kitchen. What you enter at each step and what the program decides.
You're back from the customer's home with a tape measure's worth of numbers: wall lengths, ceiling height, a column, a beam, where the window is, the drain and the gas point. Instead of copying them from a notebook into a drawing program and from there into a parts list, you type them into CabinetWizard. The program asks five questions, you answer, and you press 🪄 Create the Kitchen. Here's what each question asks for, what the program decides behind the scenes, and how a measurement stays the same all the way to the cut list.
Where is the wizard and what does it look like?
There's a purple 🪄 wizard button on the top menu next to CNC. Click it and a full-screen window opens: the question on the left, a live drawing on the right (From above, Front, Section and a small plan), the steps along the top, and Back, Next and 🪄 Create the Kitchen at the bottom. The drawing redraws with every number you type, so a wrong size shows up before you build anything.
You can drag on the drawing or type millimetres. With an item such as a column or door selected, the arrow keys nudge it 10 mm, 100 mm with Shift; Delete removes it. The mouse wheel zooms toward the cursor up to 20×, and dragging and typing sizes work just the same when zoomed in.
Five questions: what you enter, what the program does
1. Shape
Choose straight, L or U and enter the wall lengths and ceiling height. For example, an L kitchen: Wall 1 3000 mm, Wall 2 4200 mm, ceiling 2700 mm. If the walls aren't square, you can enter the corner angle in the wizard too; the program builds each wall's cabinets parallel to their own wall.
2. Columns, beams, doors
Add ▮ Column, ▭ Short beam, 🚪 Door and 🪟 Window. Drag each into place on the drawing or position it in millimetres. For a ceiling beam you enter its drop and projection; in L and U kitchens you can add a corner column too. No cabinets are built where doors and windows are, and the area a door swings through stays clear.
3. Dimensions
This step comes pre-filled with your workshop standard: worktop height, carcass depth, gap between worktop and wall units, wall unit height. Change a value and save it with "Make these sizes my workshop standard", and the next kitchen starts with it. The live section draws the kitchen from the side with your numbers. You also enter the fridge height here; the space above the niche becomes a cabinet automatically.
4. Appliances and services
Pick the sink (450 / 600 / 900, dishwasher left or right), the hob (with oven, 600 / 900, gas or electric) and the fridge. The fridge comes as built-in (inside a tall unit, with a cabinet door in front) or freestanding with a cabinet (the fridge on the floor, a deep double door above). You position each appliance by wall and "centre from left" in millimetres, or by dragging. Water, drain and gas points come with the appliance; the program suggests sockets and you can add your own.
5. Finishing touches
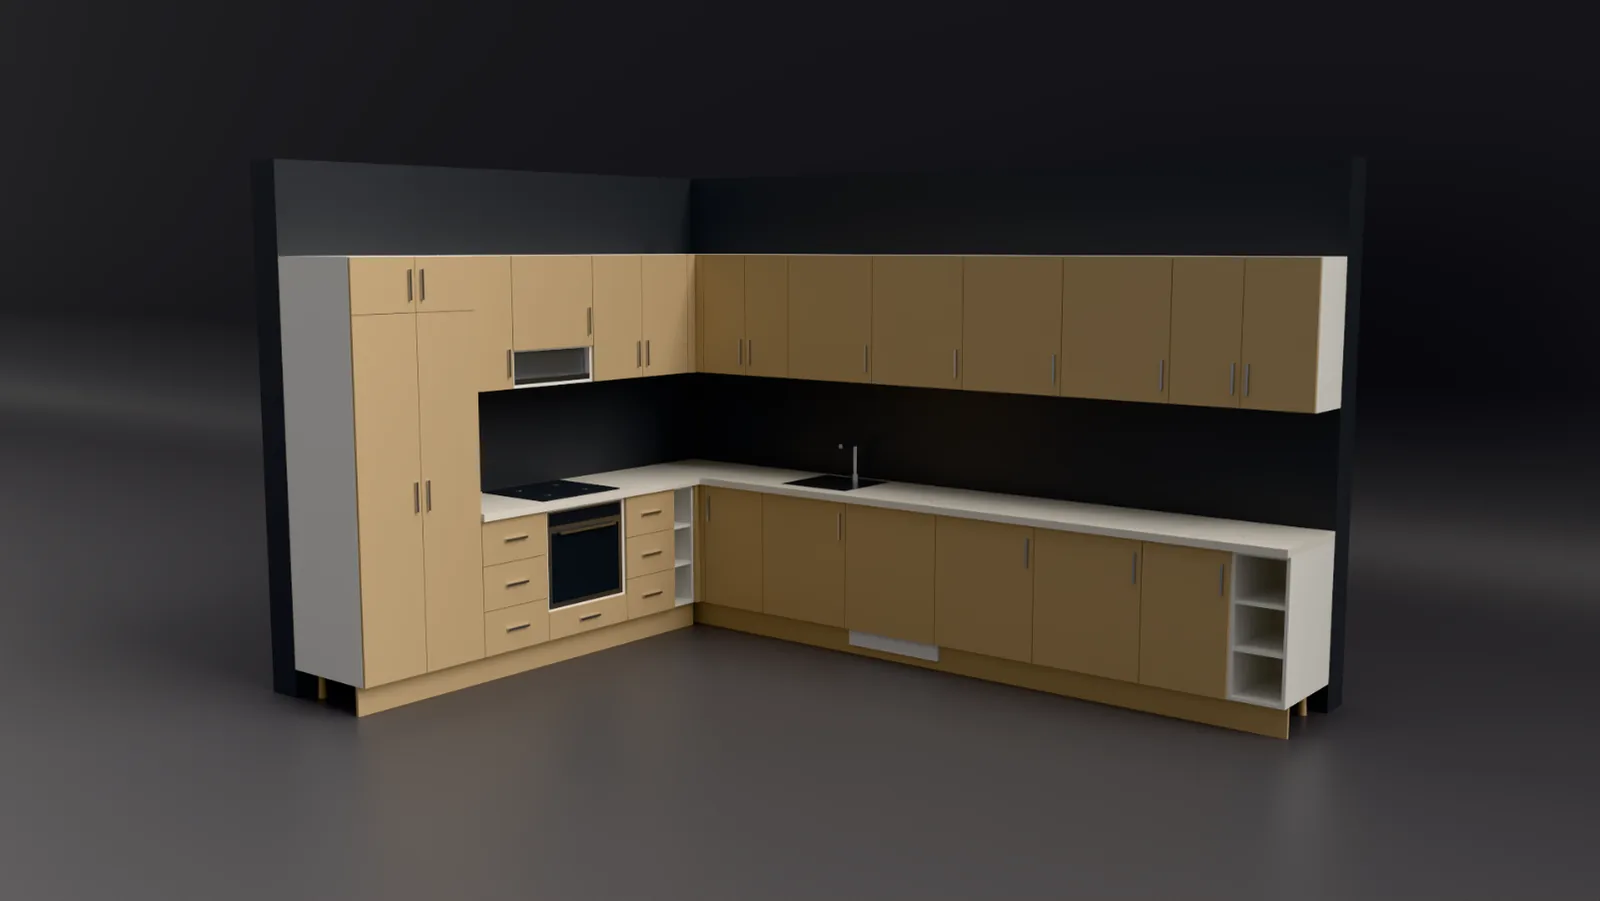
Choose wall units, hood, worktop and its material, plinth and crown. At the end you see a summary, the work triangle and any warnings. Press 🪄 Create the Kitchen and the kitchen is built in the scene with Drag & Drop open. Not happy? A single Undo takes you back to before the wizard.
The no-wizard route: typing sizes in the Walls tab
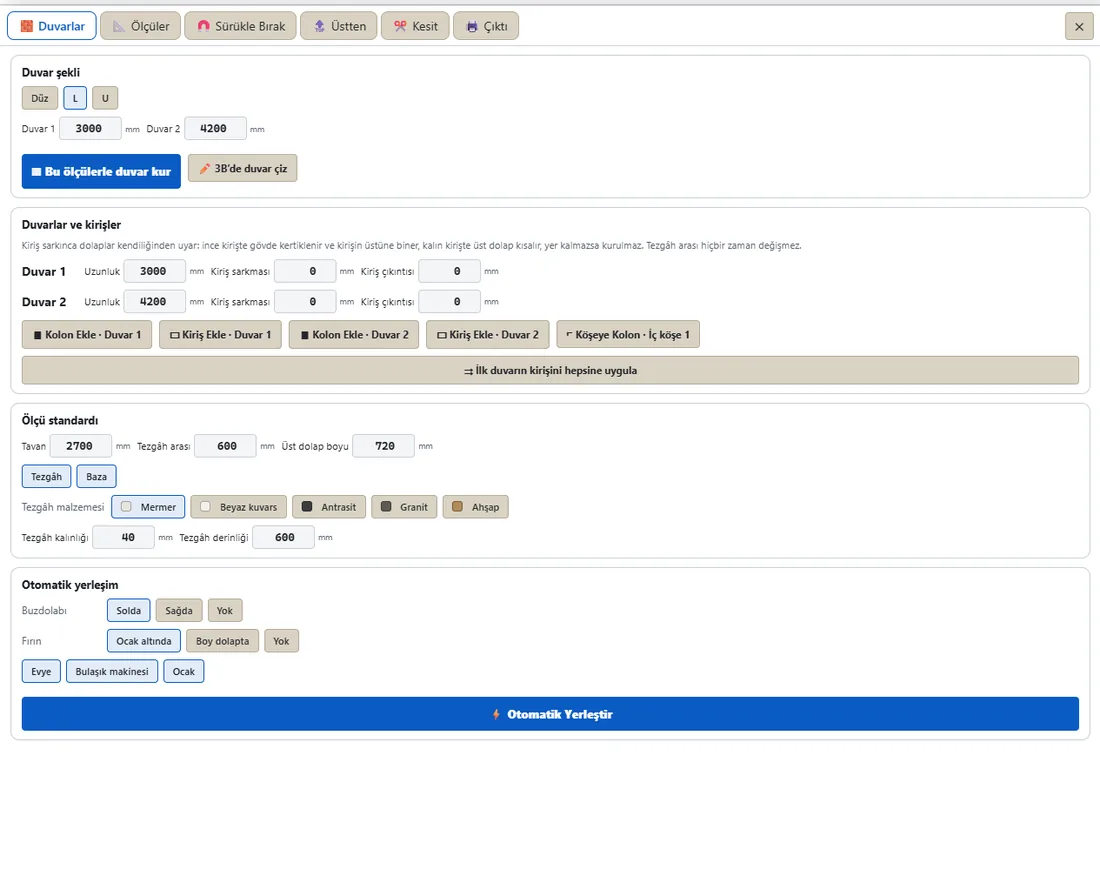
If you'd rather not go question by question, the same job can be done in the kitchen plan's Walls tab. Pick the wall shape (straight, L, U), type the Wall 1 and Wall 2 lengths and press "Build walls with these sizes", or draw the walls in 3D. Each wall gets its own length, beam drop and beam projection, and columns and beams are added wall by wall. The Dimension standard section holds ceiling height, worktop-to-wall-unit gap, wall unit height, worktop material, thickness and depth. At the bottom is Automatic layout: fridge left, right or none; oven under the hob, in a tall unit or none; sink, dishwasher and hob. Press ⚡ Auto Place and the cabinets are laid out by those choices.
Who exactly does "the rest"?
"The rest" in the title isn't an empty promise. You enter sizes and preferences; the program makes these decisions:
- Work triangle: hob and fridge are placed to a 4–7 m work triangle.
- In front of a column: a drawer unit that lands in front of a column becomes a door unit automatically; a cabinet that meets a column is notched in place.
- Beams: if there's enough room in front of the beam, the wall unit is notched; if not, and there's enough height below, the wall unit is shortened; otherwise it isn't built.
- Recesses / projections: every cabinet front stays on one line; a 350 mm cabinet with a 100 mm projection behind it becomes 250 mm deep.
- Doors and windows: cabinets in front of them are cleared, and wall units in front of a window are removed.
- Worktop and plinth: gaps between cabinets and inside corners are closed with continuous worktop; the plinth turns L and U corners.
If the result doesn't suit you, 💡 Suggest another layout shows three options; use the one you like, or go back with Ctrl+Z. When service points are known, ⚡ Auto Place puts the sink at the drain, the hob at the gas and the dishwasher next to the sink. That's what we call smart kitchen design: not in the connected-appliance sense, but planning where cabinets place themselves around the door swing, services and columns.
Dimension standard and workshop settings: type them once
Every shop has its own sizes: one uses an 18 mm carcass and 8 mm back, another makes the plinth 150 instead of 100. So you don't retype them on every job, the program has what we call a dynamic settings page: screens where changing a value recalculates the cabinets tied to it. The Workshop Standards window has a "Kitchen sizes" section, and the wizard's Dimensions step is filled in from it. In the kitchen plan, Walls › Dimension standard is where you switch on top cabinets and pick a 50 / 100 / 150 mm crown cover; the top cabinet height adjusts by itself. Machine Profile on the CNC side and Divider Settings for shelves and dividers work the same way.
This is where parametric cabinet design starts: a size is typed once, and cabinets are built tied to it. Each module's width, height and depth is a parametric dimension, a value that, when it changes, drives every part from the side panel to the shelf, the door and the back.
After creating: adjusting and fine-tuning
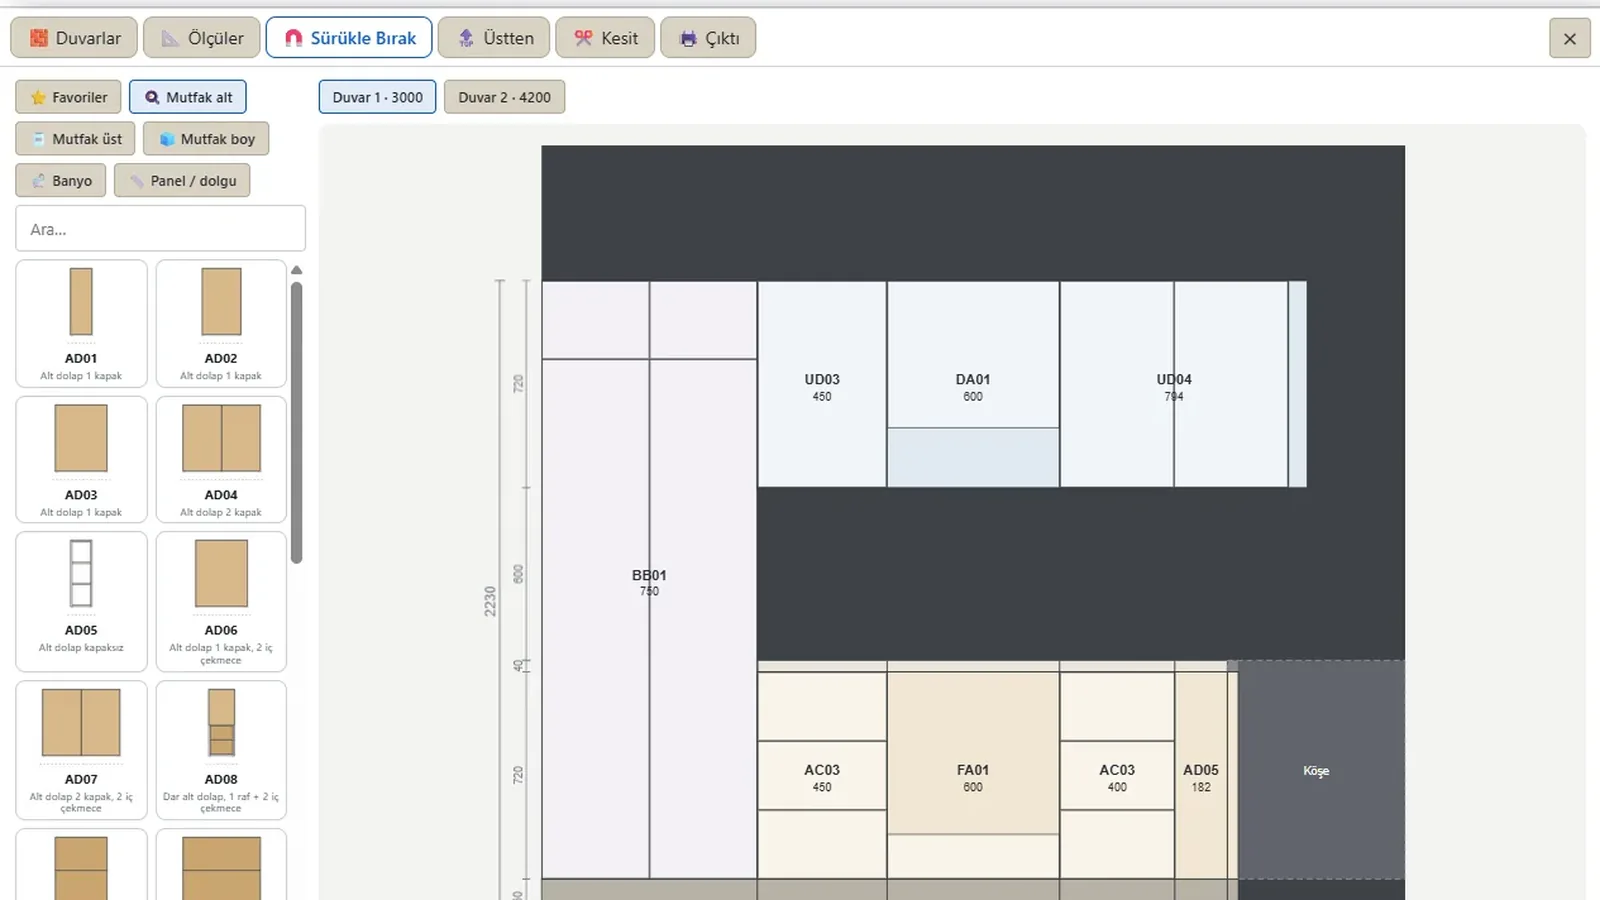
Once the kitchen is built, Drag & Drop opens. Here you make changes with drag-and-drop modules, the ready cabinets you move from the palette to the wall: a module dropped on an occupied one replaces it, a module dragged along the wall swaps places, and one dropped on another wall's tab moves to that wall. The program has 245 ready modules, each with a two-letter, two-digit code. We go into detail in Drag-and-Drop Kitchen Design.
Double-click a module to get inside it; it opens on its own in the Assembly screen. Add a shelf, move a divider, type a panel size in millimetres. On the door side there are 386 door designs; door styles, meaning slab, framed or patterned fronts, are picked from thumbnails in the 🎨 Door and handle window. Handle type and finish change there too. Because carcass and door materials are defined separately, a finish change, for example switching doors from anthracite to white, doesn't touch the carcass and shows up in the cut list's material column.
The same sizing logic works for wardrobes and room layouts: walk-in closets, children's rooms and hallways have 7 room templates and ▦ Fill the wall. We cover that in Drag-and-Drop Parametric Cabinet Layout.
From measurement to cutting: the same number, never retyped
The 4200 mm you typed into the wizard is the same 4200 the cut list, the label and the machine file are derived from. That's why, to us, fast cabinet design isn't just quick drawing; it's a size never being carried anywhere by hand. Time-saving cabinet design is exactly that: no counting parts, no working out worktop lengths, no writing lists. As we say on the site, you go from design to the CNC cutting file in 15 minutes.
On the production side, this is what's ready:
- Automatic cut list: a cut list that builds itself with each part's name, quantity, cutting size, material and banding. Its columns include grain direction, which way the board pattern runs on the part, and edge banding, the thickness of the PVC strip on the visible edge.
- Automatic sheet layout: the cutting plan shows how parts are spread across boards. For the CNC, the program does sheet nesting, arranging parts on the board with the least waste; door parts aren't rotated so the pattern stays intact.
- Export to CNC: NC (G-code) files are packed one program per sheet; the DXF opens in your shop's CAM software. Together we call them the CNC/DXF output.
Behind these steps is CabinetWizard's own CNC cutting and machining system: the Part Machining screen, a tool library and machine profiles. The generated code is read back and checked; if something's wrong, no file is produced. That's what we mean by error-free CNC cutting: the size typed into the wizard reaches the machine without anyone copying a figure by pen. For a shop doing CNC cabinetmaking, that's one source from site measurement to cutting. See the cutting section for more.
What the words mean: dynamic, studio, price
By dynamic kitchen design we mean the kitchen that comes out of the wizard isn't a frozen drawing: change a wall length or a ceiling beam and the cabinets re-arrange, with the front line intact. Kitchen cabinetry design thus starts with measuring and ends with cutting. Having all of it in one window lets the program work like a cabinet design studio: design, 3D, rendering, quoting and production output in one place, with no other program needed.
The quote comes from the same project, with a per-module or per-linear-metre price mode. For the program's own current price and launch terms, see the pricing section.
Frequently asked questions
Is the wizard only for kitchens?
The five-question wizard is for kitchens. For walk-in closets, children's rooms and hallways, the wizard has room layout cards, 7 room templates and ▦ Fill the wall.
Can I change the sizes I typed in the wizard later?
Yes. After the kitchen is built, wall lengths change in the Walls tab, module widths in Drag & Drop and panel sizes in the Assembly screen; parts are recalculated. Right after creating, a single Undo takes you back to before the wizard.
How do I use my own workshop sizes?
Enter them in the Kitchen sizes section of Workshop Standards, or use "Make these sizes my workshop standard" in the wizard's Dimensions step; future jobs start with those sizes.
Can I try the wizard in the demo?
Yes. The free 5-day demo has design, 3D, rendering and project saving; the cut list, cutting plan, NC, DXF, quote and labels are in the full version. For other questions, see 14 key questions.
By Ufuk Şen, developer of CabinetWizard